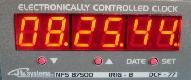
CLK-1 TIME CODE RECEIVER
Operating
modes :
A: |
Stand-alone (+/- 50 ppm
precision) |
B: |
DCF-77 via RS-232 interface
(optional) |
C: |
NFS 87500 |
D: |
Unmodulated IRIG-B via RS-232
interface |
- Mode selection by DIP switch (see instructions)
- Automatic stand-alone (A) mode if time signal is absent
- Time can be set in the stand-alone mode
- HH.MM.SS display – 6 x 14.2 red LED digits
- Date (DD.MM.YY) is displayed for 6 seconds after pushing the DATE / SET button
- 16 level variable brightness by push button
- Automatic date back-up once an hour or manually at any time
- Controls : 3 push buttons on front panel
- Power supply : 24 V DC +/- 10 %
- Consumption : less than 100 mA at maximum display brightness
- Overall dimensions : 40 x 94 x 110 mm
- Installation by clamp and wing nut
- Connections by 9 pin D plug
- Aperture needed for panel mounting : 92 x 39.5 mm
- Desk panel thickness allowable for standard version : 1 – 5 mm
- Necessary depth allowance (including mating D connector) : 170 mm
- Optional custom front panel : H > 40 mm, L > 90 mm
- C mode signal level : 0 dBm to –40 dBm
- C mode input impedance : 1 kOhm
This receiver calculates the date from
obligatory data contained in the NFS-87500 time code signal and will work with even the
simplest NFS-87500 time code generators delivering a minimal amount of data.
Instructions for Use
1. Installation
Before installing the receiver into the desk enclosure, select the
desired mode of operation (see section 2.)
The receiver is held in the desired position by the supplied clamp and
wing nut.
The aperture of the enclosure should have the dimensions as stated in
the technical description.
The receiver is inserted from the front and the clamp from the rear so
as to sandwich the panel of the enclosure.
Tighten the wing nut moderately to avoid unduly bending the clamp,
especially in the case of a thick front panel.
Tighten the wing nut to a position parallel with the bottom of the
receiver to allow the D connector to be inserted easily.
Check the wiring of the D connector, plug it in and tighten the knurled
screws.
D-connector
wiring
Contact
N° |
Circuit |
Remarks |
1. |
+ 24 V power
supply |
+/- 10 %,
inverse polarity protected |
2. |
RS-232 RXD |
Used for
modes B and D |
3. |
RS-232 TXD |
Reserved for
future options |
4. |
N. C. |
|
5. |
Power supply
ground |
Connected to
the chassis |
6. |
N. C. |
|
7. |
Line input
(floating) |
Used in mode
C (NFS-87500) |
8. |
N. C. |
|
9. |
Line input
(floating) |
Used in mode
C (NFS-87500) |
2. Mode selection
The desired mode is obtained by setting the DIP switch, which can be
accessed through the square hole on the right-hand side, as follows :
| Mode A. (stand-alone) |
N°1 = OFF
N°2 = OFF |
| Mode B. (DCF-77, option) |
N°1 = ON
N°2 = OFF |
| Mode C. (NFS 87500) |
N°1 = OFF
N°2 = ON |
| Mode D. (unmodulated IRIG-B) |
N°1 = OFF
N°2 = OFF |
N.B. Modes B and D need electrical levels in compliance with CCITT
V-24, so in mode D, for example, the nominal pulse widths for the "one" state
(negative voltage) should be 2, 5 or 8 ms respectively.
3. Display and controls
The 6 digit display indicates either the time HH.MM.SS, or the date
DD.MM.YY. The non-synchronized state (or stand-alone mode) is indicated by a flashing
rightmost decimal point and the active brightness control by flashing left and middle
separation points.
There are three control push buttons : DATE / SET, UP (triangle
upwards) and DWN (triangle downwards).
The state of each button is sampled once a second, so, if pressed and
held, will be equivalent to several separate one-second pushes.
DATE / SET control
functionality
Position |
Function |
Display |
Remarks |
0 |
Shows time |
HH.MM.SS |
See ($) |
1 |
Shows date |
DD.MM.YY |
Duration 6 s
(*) |
2 |
Brightness
adjustment |
HH.MM.SS,
flashing points |
Duration 6 s
(**) |
3 |
Set time (HH) |
HH
flashing.MM.SS |
Duration 6 s
(**) |
4 |
Set time (MM) |
HH.MM
flashing.SS |
Duration 6 s
(**) |
5 |
Reset (SS) |
HH.MM.SS
flashing |
Duration 6 s
(***) |
| |
($) |
The
position 0 benefits from an automatic return after 6 seconds of push-button inactivity. In
the stand-alone mode or if the time code signal is missing, the point in the right-hand
corner will flash. |
(*) |
In
this position one can force the receiver to memorize the date in the non-volatile memory
by pressing the DWN button within 5 seconds for at least 1 second. Otherwise, the date is
memorised automatically at the top of each hour. |
(**) |
The
displayed parameters (BR, HH, MM, SS) can be changed by the UP and DWN buttons –
increased with UP, decreased with DWN. The brightness is adjusted by eye to the required
level. If this level is left for 6 seconds, it will be held in the non-volatile memory so
that even after a supply failure, the receiver will start-up with the correct brightness. |
(***) |
The
seconds are set to zero by pressing the UP or the DWN button. Usually, one would hold the
button in until the reference clock comes to 00 seconds and would release it at that time. |
General information
Positions 3, 4 and 5 are only available
in the stand-alone (or non-synchronized) mode, because the time is set automatically when
the receiver acquires synchronization.
The DATE /SET control sequences are respectively :
0-1-2-3-4-5-0-1…. and 0-1-2-0-1….
After 6 seconds of control inactivity in any position the receiver will
go back to position 0.
It is not possible to set the date directly because it’s held in
memory in the event of loss of time code signal, but one can, if needed, advance the date
by turning the hour back to 23 hours (which will not change the date) and then forwarding
one hour or more (this time the date will change). The date is, of course, corrected after
the return of the time code signal and can be stored manually at any moment or
automatically once an hour.
The microprocessor can be reset manually by pressing simultaneously the
UP and DWN buttons for more than a second. This is, however, a software reset which could
fail in some particular circumstances. In this case, one should unplug the D connector for
a few seconds and then plug it in again.
If the time code signal fails, the receiver will switch to stand-alone
mode without losing a second. From then on, the elapsed time precision will depend on the
internal time reference, which is +/- 50 ppm for the standard version. When the time code
signal is present again, the receiver will re-synchronize within 3 seconds for modes C and
D and within 2 minutes for the mode B.
|